
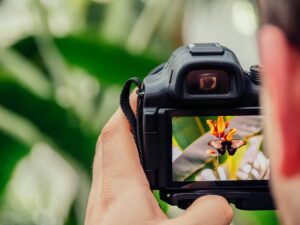
DSLR photography, or digital single-lens reflex photography, is a popular form of photography that utilizes a digital camera with a mirror mechanism. This mirror allows the photographer to see exactly what the camera sees through the viewfinder, resulting in more accurate framing and composition. DSLR cameras offer a wide range of features and settings that allow photographers to have full control over their images.
One of the main benefits of using a DSLR camera is the ability to interchange lenses. This allows photographers to choose the perfect lens for each situation, whether it be a wide-angle lens for landscapes or a telephoto lens for capturing distant subjects. DSLR cameras also offer superior image quality compared to point-and-shoot cameras or smartphones, thanks to their larger image sensors and advanced image processing capabilities.
The basic components of a DSLR camera include the body, lens, viewfinder, and various buttons and dials for adjusting settings. The body houses the image sensor, which captures the light and creates the digital image. The lens attaches to the front of the camera body and determines the focal length and aperture of the image. The viewfinder is used to compose the shot and can be either optical or electronic. The buttons and dials on the camera body allow photographers to adjust settings such as aperture, shutter speed, ISO, and white balance.
Key Takeaways
- DSLR photography involves using a digital single-lens reflex camera to capture high-quality images.
- Understanding camera settings such as ISO, aperture, and shutter speed is crucial for achieving the desired exposure.
- Mastering exposure involves balancing the amount of light that enters the camera to achieve the desired brightness and contrast in the image.
- Controlling depth of field involves adjusting the aperture to control the amount of the image that is in focus.
- Composition techniques such as the rule of thirds and leading lines can help create visually appealing images.
Understanding Camera Settings
To fully utilize a DSLR camera, it is important to understand its various settings. The three main settings that control exposure are aperture, shutter speed, and ISO.
Aperture refers to the size of the opening in the lens through which light passes. It is measured in f-stops, with smaller numbers indicating larger openings. Aperture controls two main aspects of an image: depth of field and exposure. A wider aperture (smaller f-stop number) will result in a shallower depth of field, where only a small portion of the image is in focus. A narrower aperture (larger f-stop number) will result in a larger depth of field, where more of the image is in focus. Aperture also affects exposure, with a wider aperture allowing more light to enter the camera and a narrower aperture allowing less light.
Shutter speed refers to the length of time that the camera’s shutter is open, allowing light to reach the image sensor. It is measured in fractions of a second, such as 1/1000 or 1/30. Shutter speed controls two main aspects of an image: motion blur and exposure. A faster shutter speed will freeze motion and result in a sharper image, while a slower shutter speed will introduce motion blur. Shutter speed also affects exposure, with a faster shutter speed allowing less light to reach the sensor and a slower shutter speed allowing more light.
ISO refers to the sensitivity of the camera’s image sensor to light. It is measured in numbers, such as ISO 100 or ISO 3200. A lower ISO number indicates lower sensitivity to light, while a higher ISO number indicates higher sensitivity. Increasing the ISO allows for faster shutter speeds and smaller apertures in low-light situations, but it also introduces digital noise or graininess to the image.
Adjusting camera settings for different lighting situations is crucial for achieving well-exposed images. In bright daylight, it is best to use a narrow aperture (higher f-stop number) and a fast shutter speed to prevent overexposure. In low-light situations, it may be necessary to increase the ISO or use a wider aperture (lower f-stop number) to allow more light into the camera.
Mastering Exposure
Exposure is one of the most important aspects of photography, as it determines how light or dark an image appears. Proper exposure ensures that all details in the image are visible and well-balanced.
The exposure triangle is a concept that helps photographers understand the relationship between aperture, shutter speed, and ISO. By adjusting one of these settings, the other two must be adjusted to maintain proper exposure.
To achieve a well-exposed image, it is important to understand the concept of the histogram. A histogram is a graphical representation of the tonal range in an image, with shadows on the left side, highlights on the right side, and midtones in the middle. Ideally, the histogram should be spread out evenly across the entire tonal range, without any clipping on either end. Clipping occurs when the shadows or highlights are completely black or white, resulting in loss of detail.
To adjust exposure in different lighting situations, it may be necessary to use exposure compensation. Exposure compensation allows photographers to manually adjust the exposure by increasing or decreasing the overall brightness of the image. This can be useful in situations where the camera’s metering system may not accurately determine the correct exposure.
Controlling Depth of Field
| Controlling Depth of Field | Metric | Description |
|---|---|---|
| Aperture | Aperture Value | The size of the opening in the lens through which light passes, measured in f-stops. |
| Depth of Field | The range of distance in a photograph that appears to be in sharp focus. | |
| Bokeh | The aesthetic quality of the blur produced in the out-of-focus parts of an image. | |
| Focal Length | Short Focal Length | Wider angle of view, larger depth of field. |
| Long Focal Length | Narrower angle of view, shallower depth of field. | |
| Distance | Subject Distance | The distance between the camera and the subject being photographed. |
Depth of field refers to the range of distance in an image that appears acceptably sharp. It is controlled by the aperture setting on a DSLR camera.
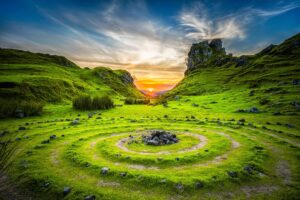
A wide aperture (smaller f-stop number) will result in a shallow depth of field, where only a small portion of the image is in focus. This is often used in portrait photography to create a blurred background and draw attention to the subject. A narrow aperture (larger f-stop number) will result in a larger depth of field, where more of the image is in focus. This is often used in landscape photography to ensure that everything from the foreground to the background is sharp.
Controlling depth of field can be a powerful tool for creative expression. By selectively focusing on certain elements in an image and blurring out others, photographers can guide the viewer’s attention and create a sense of depth and dimension.
Composition Techniques
Composition refers to how elements are arranged within an image. It is an important aspect of photography that can greatly enhance the visual impact of a photo.
One of the most commonly used composition techniques is the rule of thirds. The rule of thirds divides the image into a grid of nine equal parts, with two horizontal and two vertical lines intersecting at four points. Placing key elements along these lines or at the points of intersection can create a more balanced and visually appealing composition.
Other composition guidelines include leading lines, symmetry, and framing. Leading lines are lines within the image that lead the viewer’s eye towards the main subject. Symmetry involves creating a balanced composition by placing elements evenly on both sides of the frame. Framing involves using objects in the foreground to frame the main subject and draw attention to it.
By understanding and applying these composition techniques, photographers can create more visually interesting and engaging photos.
Shooting in Manual Mode

Manual mode allows photographers to have full control over their camera settings, including aperture, shutter speed, and ISO. While it may seem intimidating at first, shooting in manual mode can greatly improve one’s photography skills.
One of the main benefits of shooting in manual mode is that it allows for more creative control. By manually adjusting the settings, photographers can achieve their desired exposure and depth of field, resulting in more personalized and unique images.
To shoot in manual mode, it is important to understand how aperture, shutter speed, and ISO work together to create a well-exposed image. By adjusting these settings based on the lighting conditions and desired effect, photographers can achieve their desired results.
While shooting in manual mode may require more time and practice, it is a valuable skill to have as it allows for greater flexibility and control over one’s images.
Understanding Light and Color
Light is one of the most important elements in photography, as it determines how an image appears. Understanding how to use natural and artificial light can greatly enhance one’s photos.
Natural light refers to the light that is already present in a scene, such as sunlight or moonlight. It can vary in intensity, direction, and color temperature depending on the time of day and weather conditions. By observing and understanding natural light, photographers can make informed decisions about where to position themselves and their subjects for the best lighting conditions.
Artificial light refers to any light source that is not natural, such as flash or studio lighting. It can be used to supplement or replace natural light in order to achieve the desired effect. By using artificial light, photographers have more control over the direction, intensity, and color temperature of the light.
Color temperature refers to the color of light, which can range from warm (yellow/orange) to cool (blue). Different light sources have different color temperatures, and it is important to adjust the white balance setting on the camera to ensure accurate color reproduction.
By understanding how to use natural and artificial light effectively, photographers can create more visually appealing and impactful images.
Using Lenses and Filters
Lenses are an essential part of DSLR photography, as they determine the focal length and aperture of an image. There are various types of lenses available, each with its own unique characteristics and uses.
Wide-angle lenses have a shorter focal length and a wider field of view, making them ideal for capturing landscapes or large group shots. Telephoto lenses have a longer focal length and a narrower field of view, making them ideal for capturing distant subjects or compressing perspective. Prime lenses have a fixed focal length and generally offer superior image quality compared to zoom lenses. Zoom lenses have a variable focal length and offer more flexibility in terms of composition.
Filters are accessories that can be attached to the front of a lens to enhance or modify the image. There are various types of filters available, each with its own unique effect. For example, a polarizing filter can reduce glare and enhance colors, while a neutral density filter can reduce the amount of light entering the camera, allowing for longer exposures.
When choosing a lens or filter, it is important to consider the specific needs of the shot and the desired effect. By selecting the right lens or filter, photographers can achieve their desired results and enhance their images.
Post-Processing and Editing
Post-processing and editing are important steps in the photography workflow that allow photographers to enhance their images and bring out their full potential.
Post-processing involves adjusting various aspects of an image, such as exposure, contrast, color balance, and sharpness. This can be done using editing software such as Adobe Lightroom or Photoshop. By making these adjustments, photographers can correct any mistakes made during shooting and create a more visually appealing image.
When editing photos, it is important to maintain a natural look and avoid over-processing. While it can be tempting to apply various filters and effects, it is important to remember that less is often more. The goal of editing should be to enhance the image while maintaining its authenticity and capturing the photographer’s vision.
Tips and Tricks for Better Photography
In addition to the topics covered above, there are many other tips and tricks that can help improve one’s photography skills.
One tip is to practice regularly and experiment with different techniques and settings. By constantly challenging oneself and trying new things, photographers can continue to grow and improve their skills.
Another tip is to study the work of other photographers and seek inspiration from various sources. By analyzing and understanding what makes a great photo, photographers can apply those principles to their own work.
There are also many resources available for further education and inspiration, such as online tutorials, photography books, workshops, and photography communities. By taking advantage of these resources, photographers can continue to learn and expand their knowledge.
In conclusion, DSLR photography offers a wide range of possibilities for creative expression. By understanding the basic components of a DSLR camera, mastering camera settings, controlling exposure and depth of field, using composition techniques, shooting in manual mode, understanding light and color, using lenses and filters, and post-processing and editing, photographers can greatly enhance their skills and create more visually appealing images. With practice and continued learning, anyone can become a skilled DSLR photographer.
If you’re interested in learning how to use a DSLR camera, you might also find this article on hidden cameras from HiddenCam Store intriguing. They provide tips and tricks for placing hidden cameras in your home for surveillance purposes. It’s a comprehensive guide that can help you understand the different options available and how to make the best choice when purchasing a hidden camera from Amazon. Check out the article here to enhance your knowledge on surveillance techniques.
FAQs
What is a DSLR camera?
A DSLR camera is a digital camera that uses a mirror and prism system to reflect light from the lens to the viewfinder, allowing the photographer to see exactly what they are capturing.
What is a DSLR beginner course?
A DSLR beginner course is a photography course designed for individuals who are new to using a DSLR camera. The course covers the basics of photography, including camera settings, composition, and lighting.
What will I learn in a DSLR beginner course?
In a DSLR beginner course, you will learn the basics of photography, including camera settings, composition, and lighting. You will also learn how to use your DSLR camera to its full potential, including how to shoot in manual mode.
Do I need a DSLR camera to take a DSLR beginner course?
Yes, you will need a DSLR camera to take a DSLR beginner course. The course is designed to teach you how to use your DSLR camera to its full potential, so it is important that you have access to one.
How long does a DSLR beginner course last?
The length of a DSLR beginner course can vary, but most courses last between 4-8 weeks. Some courses may be shorter or longer depending on the depth of the material covered.
Do I need any prior photography experience to take a DSLR beginner course?
No, you do not need any prior photography experience to take a DSLR beginner course. The course is designed for individuals who are new to using a DSLR camera and want to learn the basics of photography.
